My family is my people! They are my tribe and the ones I hold dearest to my heart. I wanted to create a space that shows off our happy fam vibes and this cozy alcove in our living room was just the space that could pull it off!

The shiplap is one of the easiest DIYs and this is now the third time using shiplap and I think we get more pro the more we do it. I measure, he cuts. I do the measurements because I don’t understand my husband’s 4/8” (uh that would be ½” honey) or a notch above/below half.
Anywho, we purchase the 12’ shiplap lengths from Home Depot and the best part is it comes primed and the typical shiplap spacing is already built in which makes leveling way easy! We start from the top and work our way down checking the level as we go along here and there and make any minute adjustments. We tucked the corners in real tight so we didn’t need to buy any corner molding for the inside corners.
We made sure to cut out the electrical units because, well, can’t really go covering those up now can ya? When going around those it makes the sheetrock further back so we purchased these recessed electrical outlets and it gives it a nice streamlined and clean look.
Once all the shiplap is up we just finished the outside corners with PVC corner molding; also already white so no painting! YAY! And speaking of paint, we used our favorite white Behr Ultra Pure White in a flat finish.
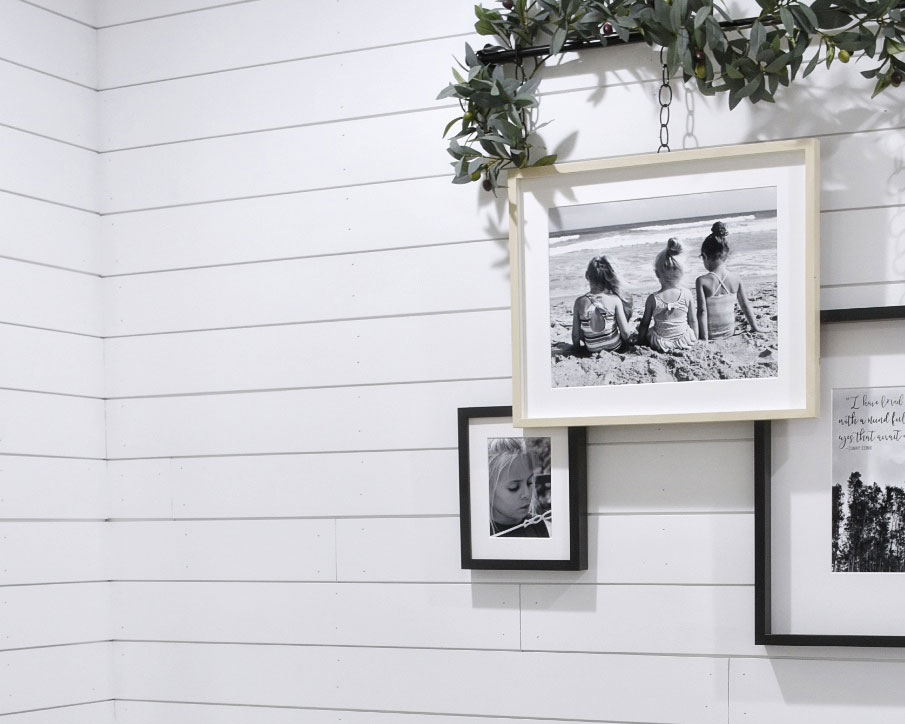
Now onto the layered hanging gallery wall. I was inspired by how Erin at cottenstem.com created her family wall of beautiful words and layered her embroidery hoops over the signs. You can check her post out here. I loved the layers she created and thought, hey, why not layer prints of our girls?
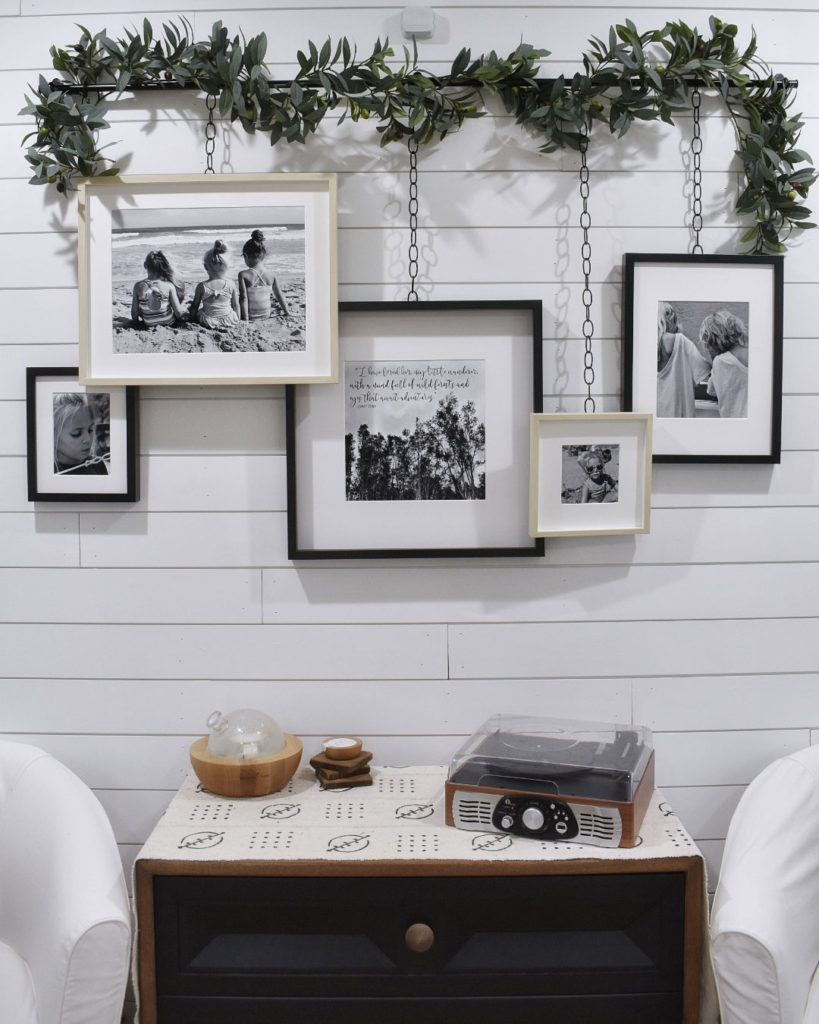
I wanted to put my own creative spin on it so I had the idea to mount these bars and hang varying sized frames from the bar, layering as I went. I wasn’t sure how I was going to hang them but then remembered I had chain left from a project I had attempted a while ago so that would be perfect! (this is why I have a hard time throwing things away) I used different RIBBA frames and HOVSTA frames from Ikea.
While in Ikea I started laying them out on the floor to see how they would all work together. (Sorry to the lady with the cart that had to backtrack down the aisle I had taken over.) Once home I started going through photos I had taken of the girls and picked some of my faves and turned them into black and white prints that I printed out. I was also inspired by a beautiful quote by Conny Cernik so I designed a print around the quote and made sure it would be centered in my gallery. Then I simply added them to the frames and voila, they were ready to hang.

It took a little adjusting here and there because the chain wouldn’t allow for some of the frames to lay flat. A few I simply added a nail to the wall and hung the picture on it and made the chain APPEAR as if it was holding up the picture. A little smoke and mirrors friends.

The dresser was another DIY I had done about 6 months or so ago. This dresser came from a secondhand store and was a beautiful emerald green. It really was a pretty color and when I had my brief stint with *all things color* it went perfectly. But since I’ve discovered my true design style it no longer jived. You can read how I transformed her in this blog post about my neutral living space and you’ll also get a glimpse of what this alcove used to look like!
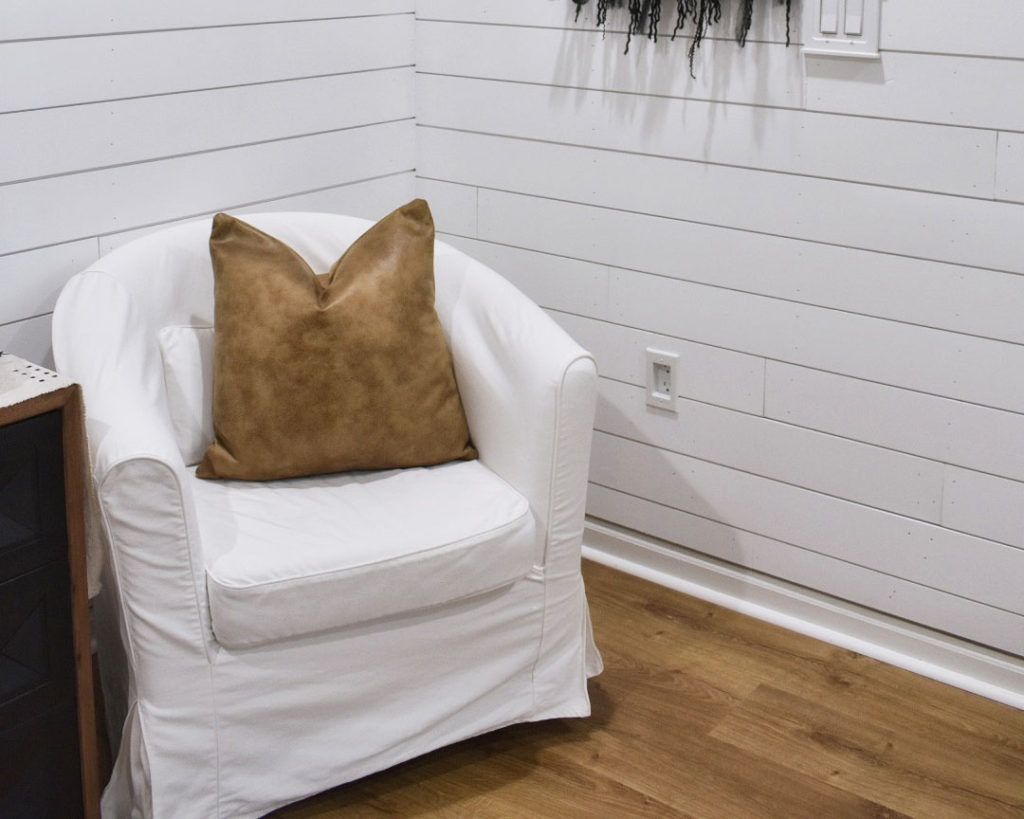
The chairs are from Ikea and they are the Tullsta chairs with the natural white covers. Super easy to clean and a little insider tip…don’t dry the covers completely. While they are still a little damp put them back on the chairs. They stretch easier and are less of a struggle to get back on!
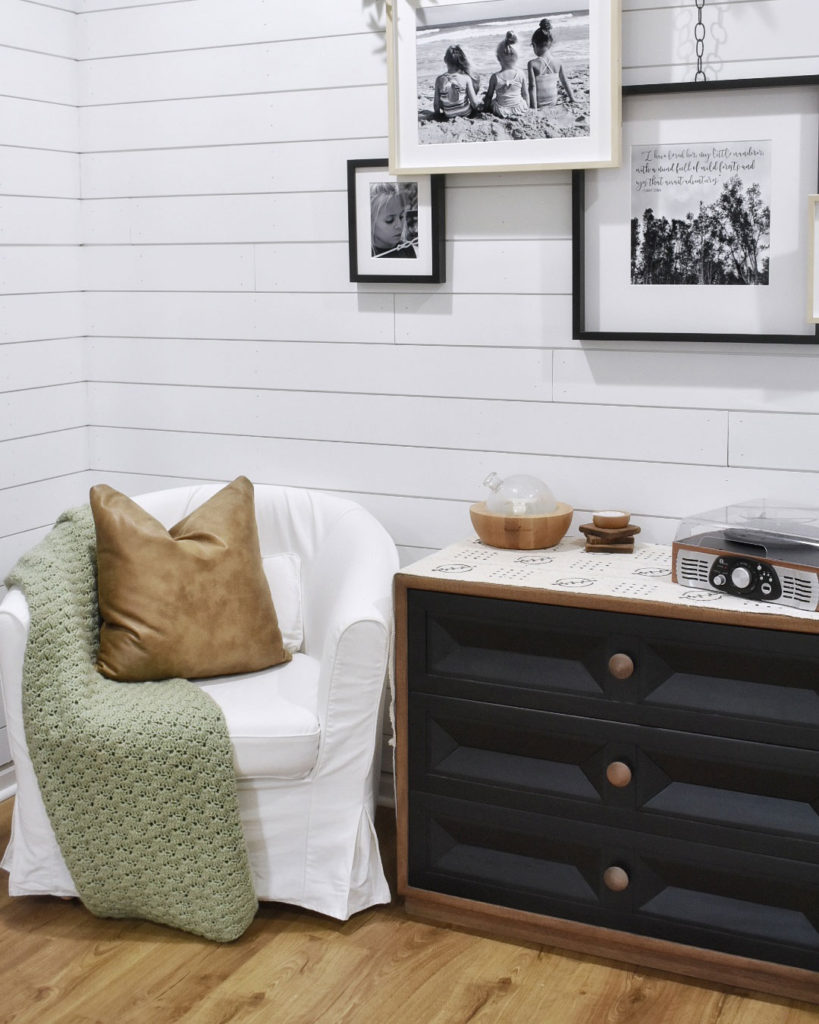
These pillows were yet another DIY. The pillows that I had originally there were yellow and pretty but not the look I was going for. Lucky for me they were purchased from Home Goods and, as some of you may know, many of the Home Goods pillows have removable covers so I was able to remove the yellow cover, sew up a new cover and re-use the down insert. The fabric I used was from Hobby Lobby and it is super soft! It brought in that warmth I so love!
The throw was made by my mother who crochets like a champ! I have a few of her handmade throws and they are so versatile and I love using them and displaying them over chairs. Plus the green/sage in this went perfectly with the greens in the olive branch garland I found at Hobby Lobby.
This cozy space is a great chill spot! I mean there is no way one could NOT be relaxed while sitting comfortably with coffee in hand, listening to classical music on the Record Player and inhaling the calming oils in the diffuser.

If any of you have an inspiring gallery wall or wish to recreate this one I’d love for you to share! Comment below if you have any questions or if I didn’t link something you need!
Loves, come follow along on my Instagram for more pics, life and decor, and be sure to check out the Avelyn Lane Pinterest and Facebook page, too!
Health, Happiness, and Abundance!
Jess
Full DISCLAMER | DISCLOSURE